はじめに
macでGo開発するときにvimの環境を整えるメモです。
vimでこんな感じの事ができるようになればいいやーくらいの感じです。
- 補完
- lint
- 関数定義へジャンプ
- ドキュメント(GoDocを開く)
アジェンダ
1. GOPATH確認
GOPATHを念のため確認します。
$ echo $GOPATH
/Users/hoge/.go

$ vim ~/.bashrc
---- vi追記 ----
export GOPATH=$HOME/.go
export PATH=$PATH:/usr/local/opt/go/libexec/bin
export PATH=$PATH:$GOPATH/bin
---------------
2. Vundleでvim-goの設定&インストール
vimにvim-goの設定
~/.vimrcにVundleの設定を追記します。
$ vim ~/.vimrc
---- vim追記----
set nocompatible              " be iMproved, required
"filetype off                  " required

set rtp+=~/.vim/bundle/Vundle.vim/
call vundle#begin()

Plugin 'VundleVim/Vundle.vim'

" golangに関して以下2行を追記
Plugin 'fatih/vim-go'
Plugin 'nsf/gocode', {'rtp': 'vim/'}

call vundle#end()            " required
filetype plugin indent on    " required
---------------
vim-goインストール
適当にVimを開いた状態で :PluginInstall コマンドを打って
追記したvim-goとgocodeをインストールします。
特に設定を変えていなければ~/.vim/bundle配下にインストールされた事が確認できます。
$ ls -l ~/.vim/bundle/
total 0
drwxr-xr-x  15 hoge  hoge   510 12 12 01:22 Vundle.vim
drwxr-xr-x  36 hoge  hoge  1224  1 16 15:14 gocode
drwxr-xr-x  13 hoge  hoge   442 12 12 01:25 nerdtree
drwxr-xr-x  23 hoge  hoge   782  1 16 15:14 vim-go
Vundle自体の設定についてはこちらをご参考まで。
3. Vundleでvim-goの依存パッケージのインストール
適当にvimを起動している状態で:GoInstallBinariesを打って依存パッケージをインストールします。
こんなコマンドまで用意されていて便利!!
コマンドを打つとxxx not foundな感じで、入っていない依存パッケージをチェックして勝手にインストールしてくれます。
vim-go: goimports not found. Installing golang.org/x/tools/cmd/goimports to folder /Users/hoge/.go/bin/
vim-go: guru not found. Installing golang.org/x/tools/cmd/guru to folder /Users/hoge/.go/bin/
vim-go: gorename not found. Installing golang.org/x/tools/cmd/gorename to folder /Users/hoge/.go/bin/
vim-go: golint not found. Installing github.com/golang/lint/golint to folder /Users/hoge/.go/bin/
vim-go: godef not found. Installing github.com/rogpeppe/godef to folder /Users/hoge/.go/bin/
vim-go: errcheck not found. Installing github.com/kisielk/errcheck to folder /Users/hoge/.go/bin/
vim-go: gotags not found. Installing github.com/jstemmer/gotags to folder /Users/hoge/.go/bin/
vim-go: asmfmt not found. Installing github.com/klauspost/asmfmt/cmd/asmfmt to folder /Users/hoge/.go/bin/
vim-go: motion not found. Installing github.com/fatih/motion to folder /Users/hoge/.go/bin/
vim-go: gogetdoc not found. Installing github.com/zmb3/gogetdoc to folder /Users/hoge/.go/bin/
vim-go: impl not found. Installing github.com/josharian/impl to folder /Users/hoge/.go/bin/
4. おもむろに動作確認
go-commandsが効く事をためす
適当なディレクトリに適当なgoファイルを作って試してみます。
まずは:GoFmt(整形してくれる君)を試します。
# homeディレクトリに適当なディレクトリ適当なgoファイルを作ってみる
$ pwd
/Users/hoge/

$ mkdir sample
$ touch sample.go

# 適当なインデントで書く
$ vim sample/sample.go
- 新規作成時のファイル
package sample

import (
           "fmt"
)

func main() {
fmt.Print("test\n")
              fmt.Print("test\n")
}
:GoFmt実行時 or:wで保存時に自動整形される
package main

import (
  "fmt"
)

func main() {
  fmt.Print("test\n")
  fmt.Print("test\n")
}
補完を試す
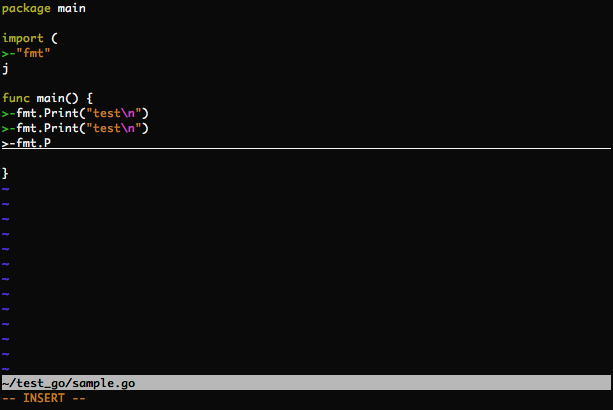
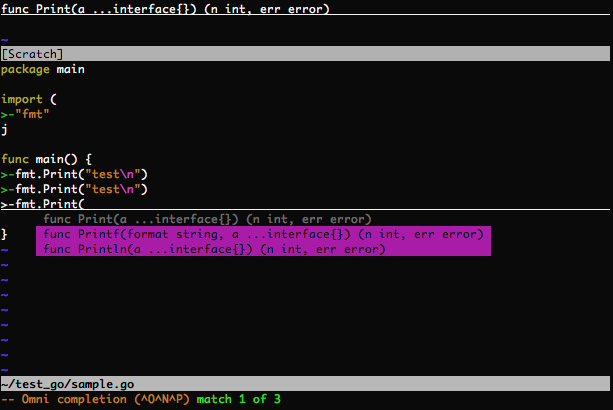
fmt.Pまで打ってから<C-x><C-o>(Ctrlを押したままx,o)と打つとこんな感じで補完されます。
実行を試す
また、:GoRunと打ってみるとこのファイルを実行できます。
ただprintしているだけですが下記のように表示されますね。
Press ENTER or type command to continue
[No write since last change]
test
test

Press ENTER or type command to continue
5. go-commandsメモ(help、:GoPath、:GoFmt、:GoDef、:GoDoc、:GoLint)
おまけ的にいくつかのgo-commandsを書いておきます。
help
基本的にgo-commandsは以下の2つで探せばいろいろでてきます。
* vim-goリポジトリのREADMEを見る
* vim開いてる状態で:help vim-goと打つ
README
https://github.com/fatih/vim-go
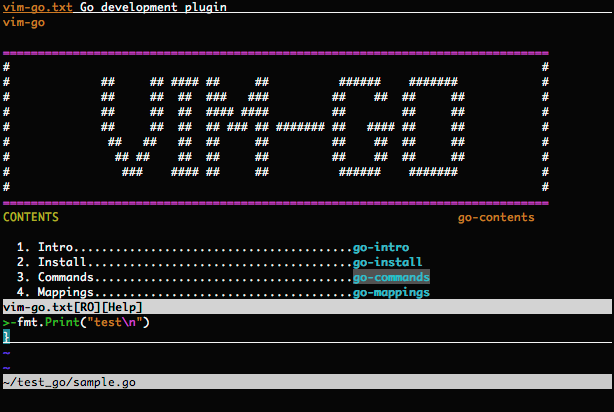
:help vim-go
こんな素敵な画面でhelpを見れます

以下のgo-commandは、簡単な説明との結果も合わせて貼っておきます。
:GoPath
説明
名前からもわかる通り、vimを開いたままGoPathを表示してくれます。
direnvなどでプロジェクトごとにGOPATHを切り替えてる場合は役立ちます。
:help vim-go 引用
:GoPath [path]

    GoPath sets and overrides GOPATH with the given {path}. If no {path} is
    given it shows the current GOPATH. If "" is given as path, it clears
    current GOPATH which was set with :GoPath and restores GOPATH back
    to the initial value which was sourced when Vim was started.
:GoFmt
説明
ソースをよしなにGo形式にフォーマットしてくれます。
:help vim-go 引用
:GoFmt

    Filter the current Go buffer through gofmt.  It tries to preserve cursor
    position and avoids replacing the buffer with stderr output.
:GoDef
説明
ソース中の任意のwordにカーソルがある状態で:GoDefと打つと定義元のファイルに飛んでくれます。
vim側のコマンドの<C-o>で、元いたファイルに戻れます。便利!
また、:help vim-go引用にも記載されてる通り、
デフォルトでショートカットが割り当てられているのでgdと打つだけでも使えます。
:help vim-go 引用
:GoDef [identifier]
gd
CTRL-]

    Goto declaration/definition for the given [identifier]. If no argument is
    given, it will jump to the declaration under the cursor. By default the
    CTRL-] key and the mapping gd are enabled to invoke :GoDef for the
    identifier under the cursor. See 'g:go_def_mapping_enabled' to disable
    them.

    vim-go also keeps a per-window location stack, roughly analogous to how
    Vim's internal tags functionality works. This is pushed to every time a
    jump is made using the GoDef functionality. In essence, this is a LIFO
    list of file locations you have visited with :GoDef that is retained to
    help you navigate software.
:GoDoc
説明
ソース中の任意のwordにカーソルがある状態で:GoDefと打つと定義元のファイルに飛んでくれます。
vim側のコマンドの<C-o>でもといたファイルに戻れます。便利!
また、:help vim-go引用にデフォルトでショートカットも割り当てられているのでgdと打つだけでも使えます。
:help vim-go 引用
:GoDoc [word]

    Open the relevant GoDoc in split window for either the word[s] passed to
    the command or by default, the word under the cursor.
:GoLint
説明
vimで開いているファイルに対してlint(構文チェック)を通してくれます。
PASSと出ればOK、エラーの場合は表示してくれます。
:help vim-go 引用
:GoLint [packages]

    Run golint for the current Go file, or for given packages.
参考
以下のサイトを参考にさせて頂きました!thx! * VimでGoの開発環境を設定する方法のまとめ * vim-goをインストールしてみた(所要時間:15分) * MACで Go言語の開発環境(Go+Vundle+Vimgo+gocode)セットアップ
おわり
GoDocなんかはローカルサーバ立ち上げてみるのも良いですし、goはいろいろ用意されてて便利ですね!\(^o^)/

